If your dentist has told you that you need to have a tooth pulled, you might be feeling a little nervous. That’s completely normal! A tooth extraction is a procedure where a dentist carefully removes a tooth.
This might be necessary for a few common reasons, like if a tooth has a really bad cavity, is damaged from an injury, or if your mouth is too crowded. Knowing what to expect is the first step to feeling more confident and calm about your appointment.
Your Guide to a Smooth Tooth Extraction: How to Prepare and Recover
Finding out you need a tooth pulled can make anyone feel a little anxious. But knowing what to expect and how to prepare can make a huge difference. Proper preparation is about setting yourself up for a smooth and comfortable recovery. This guide will walk you through every step, from your first appointment to your healing at home, so you can feel confident and in control.
Your First Step: The Consultation with Your Dentist
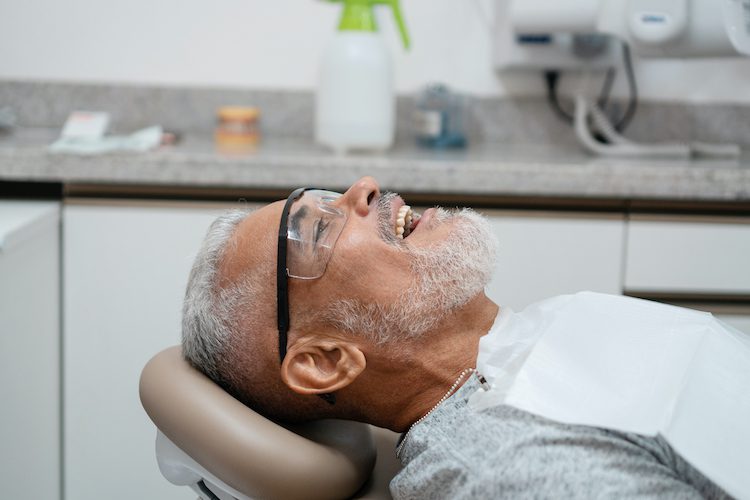
Before any work, you’ll have a consultation appointment. This is your chance to get all your questions answered and for your dentist to create an effective plan. During this visit, your dentist will carefully examine your mouth and take X-rays.
These pictures will show the entire tooth, including the root shape and the health of the surrounding bone. This helps your dentist plan the best way to remove the tooth.
This is also the time to be completely open about your health. You’ll need to share your full medical history, including any conditions like diabetes or heart issues. Make sure to provide a list of all medications you’re taking, including prescriptions, over-the-counter drugs, and even vitamins or supplements.
It’s especially important to tell your dentist about any known allergies, particularly to medications or anesthesia. All this information is kept confidential and is used for one reason only: to keep you safe and comfortable during the procedure. Don’t be afraid to ask questions because this conversation is the foundation for building trust with your dentist.
Getting Ready: Your Mind and Body
It’s perfectly normal to feel some nerves before a dental procedure. Mental preparation can help you turn a scary experience into a manageable one. In the days leading up to your appointment, try simple relaxation techniques. For example, slowly breathe in through your nose for four counts, hold it for four, and then exhale through your mouth for four.
You can also try visualization. Imagine yourself going through the appointment calmly and then feeling relieved when it’s all over. Remember why you’re doing this too. You’re getting rid of pain and preventing a more serious problem down the road.
Your physical preparation is just as important. Your dentist will give you specific instructions, and following them carefully is key to your safety. If you’re going to be sedated, you’ll almost certainly be told not to eat or drink anything for several hours before the appointment.
This might seem strange, but it’s a critical safety step to prevent complications while you’re under anesthesia. On the day of the procedure, wear a comfortable, loose-fitting t-shirt or sweatshirt. This will help you feel more relaxed in the dental chair.
The Practical Details: Transportation and Home Prep
You might be wondering, “Can I just drive myself home?” If your procedure involves any kind of sedation or even strong numbing medication, the answer is no. The effects can make you drowsy and slow your reaction times, making driving as dangerous as driving drunk.
You must arrange for a trusted friend or family member to drive you to and from the appointment. It’s a good idea to have them come into the office with you so the dentist can give them the post-care instructions as well. Planning this ahead of time eliminates last-minute stress.
You’ll want to be a total couch potato for the rest of the day, so prepare your home in advance. Stock your kitchen with soft, easy-to-eat foods that require no chewing. Great options include yogurt, pudding, mashed potatoes, applesauce, and protein shakes. Avoid anything crunchy, spicy, or full of small seeds that could get stuck in the wound.
Set up a cozy recovery spot on your sofa or bed with plenty of pillows. You’ll need to keep your head elevated to reduce swelling. Having your pain medication, ice packs, and remote control within arm’s reach will make your recovery much more comfortable.
Your Roadmap to Recovery: The First 24 Hours
The procedure itself is usually the quickest part. The real focus is on what you do afterward to heal properly. Your dentist will provide specific instructions, but here’s what you can generally expect:
- Managing Pain and Swelling: Some pain and swelling are normal. Your dentist will likely recommend or prescribe pain medication. Take it as directed, don’t wait for the pain to become severe. To control swelling, use an ice pack on the outside of your cheek for 15 minutes on, then 15 minutes off, for the first day.
- Protecting the Blood Clot: The most important part of healing is protecting the blood clot that forms in the socket where your tooth used to be. Do NOT rinse your mouth vigorously, spit, or use a straw for the first 24 hours. The suction can dislodge the clot, and cause a painful condition called a dry socket. Gently dab at your mouth with a tissue if you drool.
- Eating and Drinking: Stick to cool, soft foods and liquids. Avoid hot beverages, as heat can increase swelling. It’s also important to stay hydrated, so drink plenty of cool water.
Watching for Warning Signs and Following Up
Healing usually goes smoothly, but it’s smart to know the signs of a problem. Some oozing of blood, minor swelling, and discomfort are all normal. However, you should call your dentist right away if you experience:
- Bleeding that doesn’t slow down after applying gentle pressure with gauze
- Throbbing pain that gets worse instead of better after a few days
- Signs of infection, like a fever, chills, or pus coming from the socket
- Swelling that continues to worsen after two days
Attending your follow-up appointment is crucial. It allows your dentist to check on your healing progress and ensure everything is on track.
You’re Not Alone in This
At Historic Hyde Park Dentistry, we know that a tooth extraction can be daunting. Our entire team, led by Dr. Rebecca Benedict, is dedicated to making your experience as comfortable and stress-free as possible.
From your first consultation to your final follow-up, we are here to guide you. If you have a tooth that’s causing trouble, don’t wait to call us at 813-733-6981. Proper preparation leads to a better outcome. Schedule a visit online today.